By Eric Ramirez
Front derailleurs have a very critical function when it comes to riding. When it’s time to make the shift into the big ring, it’s something that is supposed to work correctly. If you don’t have a properly adjusted front derailleur, this could be a huge let down on your next ride. As your friends pull away on the flats, you’re spinning your gears stuck in the small chainring.
The front derailleur derails by simply pushing the chain into or off of the next chainring. The majority of the shift happens because of the chainring itself. (This has been discussed in previous articles in Cycling West during the 2018 riding season.) But first, the chain has to be pressed into the chainring by a properly adjusted derailleur.
In order to adjust a front derailleur, I’ve outlined 5 simple steps. Note that these adjustments apply quite loosely to SRAM’s Yaw front derailleurs. SRAM provides detailed instructions to installing and configuring Yaw front derailleurs.
Step 1 – Front Derailleur Alignment

To simplify the alignment, it can help to remove the chain from the bike, but this is not completely necessary. Then, detach the shift cable, and loosely install the front derailleur on the frame. Now, align the derailleur so that the shifting plates are parallel to the chainrings. This is easiest done by turning the “L†(low) limit screw several turns and pushing the derailleur away from the mount. I like to make the outer plate flush – or on the same plane – with the outer chainring. From this point it is easy to correct any bad angle.
It is also time to set the vertical alignment. Shimano, Sram, and Campagnolo (for the most part) agree that the bottom of the outer plate should be 1-3 millimeters from the tops of the large chainring’s teeth. Move the derailleur around and make it so.
Clamp the derailleur into place on the frame by tightening the clamp bolt to about 4 Nm. This prevents twist and shouldn’t mess with your paint.
Step 2 – Low Limit and Chain

With the derailleur properly aligned, setting the low limit is easy. Unscrew the “L†or low limit adjustment until the inside of the inner front derailleur plate is back over the small chainring. Now, if you have removed your chain, then reinstall it. Shift the chain into the “lowest,†or climbing, gear in the rear. Take a look at the space between the chain and the inside of the inner plate of the front derailleur.
Is there a gap? Is the chain rubbing? What we should see here is a 1.5 – 2.0 millimeter gap. (picture 1.2). If there is no gap or the gap is too large, adjust the low limit accordingly. Once this is set, it rarely needs to be readjusted.
Step 3 – Cable Attachment
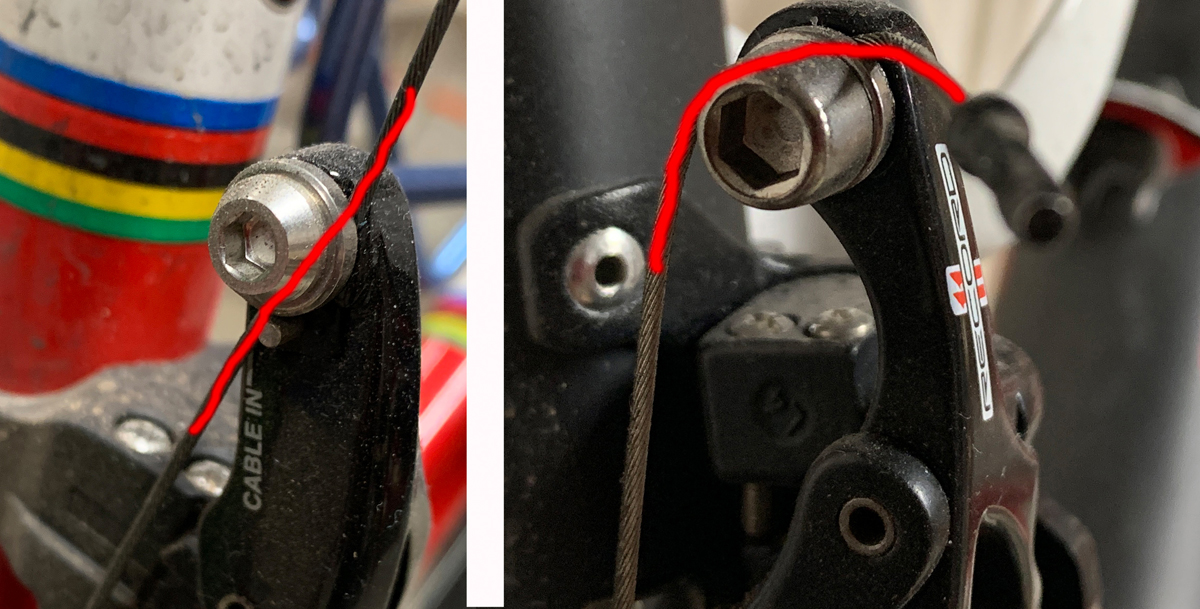
Make sure that the front shifter is in the lowest gear setting so that no extra cable is in the shifter. At this point, pull the cable taut and clamp it in the pinch-bolt fixing point. Make sure that the cable is installed to manufacturer specification. Not all derailleurs affix the cable in the same manner or routing.
Newer generations of Shimano derailleurs do not have very intuitive cable mounting configurations. Find out and don’t make an assumption. There are specific instructions for these systems.
Step 4 – High Limit

Start turning the pedals, assuming the bike is hanging from the saddle or in a work stand. Shift the rear into the 3rd cog. Now, shift the front derailleur onto the big chainring. This should happen easily. Once there, shift the rear derailleur into the smallest cog, usually the 11-tooth. The outside of the chain should have about a 2-millimeter gap to the inside of the outer front derailleur plate.
Adjust the “H†or high limit so that the chain does not rub but also allows this gap. Be sure that the high limit stops the derailleur from moving beyond that gap, as this will send the chain off the chainring. This is the baseline for front derailleur high limit adjustment.
Step 5 – Test Ride
Certain chainrings can easily push the chain to the outside and off and will require even the best derailleur to be adjusted further in (closer to the big chainring) at the high limit. If your shifter has trim (smaller shifts that don’t move the chain) then test that.
Take the bike out of the work stand and give it a spin around the block. Make the necessary cable tension adjustments to dial in the shift, paying close attention to chain rubbing – there should not be any. If the chain isn’t going onto the big ring after a couple turns of the barrel adjuster, then there might be some wear on the chainring that needs to be addressed (time for a new chainring).
These are the fundamental adjustments of a front derailleur. Sometimes your derailleur will need some customized attention. The final result should be a smooth and crisp shift, with minimal noise.
If you were getting dropped on the group ride because you couldn’t get to the big ring, you won’t be able to use that excuse anymore!
Eric has 20 years experience working on bikes, starting in Park City. Today he’s a head technician at a shop and maintains a blog about wrenching and adventures at angrybikemechanic.com
More From Forest Beat

Matthew Boerke Believes We Are All Part of the Solution
Matthew Boerke's daily commute mileage is 11.3 miles one way, 22.6 round trip; which is a fairly significant trip. He rides 2500 South to...
2
minutes
A Guide to Cycling Pedals
By John Higgins - Cycling pedals are taken for granted by experienced cyclists and viewed with trepidation by new cyclists. What is their function and...
13
minutes
Off Season Nutrition: What Does Eating Clean Mean to You?
By Breanne Nalder, MS, RDN, PLAN7 Endurance Coaching Dietitian and Nutrition Coach — Isn’t Fall wonderful? We have the residual summer fitness and gorgeous weather...
3
minutes
Nordic Skiing is the Perfect Winter Sport for Cyclists
By Tom Noaker - We've all heard about the physiological attributes of Nordic skiing as an 'off-season’ training regimen for cyclists but here are a...
3
minutes